


Many of us craving to keep their personal (say something special related to life) dairy which requires secrecy from others even friends and family members. Some group of people (team members) desires to create their own site where they can discuss their interesting things and nobody else would be able to access their work and discussions.
One of the most useful features of blogger blog is that you may make your own blog either public (by default) or private blog. In other words, if you want to keep your blog not available to anyone in the world then you can make it private which restrict all visitors from viewing your blog. Thus, you may make restrictions so that the whole wide world readers can’t read your blog.
By default, anyone on the internet can read the published posts on your blogger blog. However, you may choose the readers (your friends, family, group, members etc.) to access or team members/ authors by inviting them through email address.
Make Restriction for Accessing Your Blogger Blog Posts
There are three options provided by blogger BlogSpot.com blog viz. (i) Public, (ii) Private Blog- Only blog authors and (iii) Private Blog – Only these readers. The first one is by default option (Public) which enable your blog open to all internet users.
If you want to make your blog readable for the limited persons or only for administrators then follow these simple steps for giving permission to view your blog.
Step-1: Login to Blogger Blog
After login into blogger.com, from your blog dashboard go to the Settings tab.
Step-2: Blog Permissions
Click on Reader access under Permissions section.
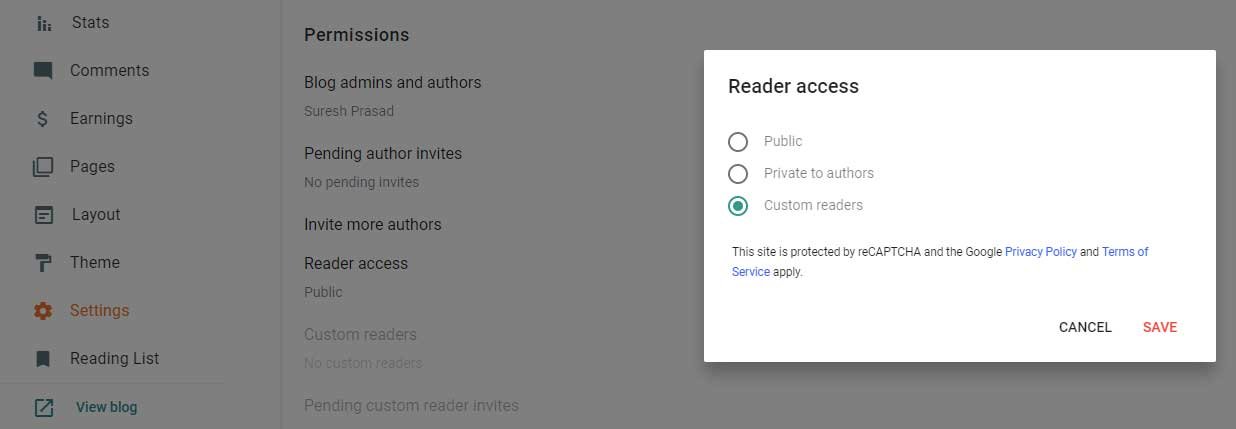
Step-3: Reader Access
Now, select one of the two options to make your blog either accessible only for blog authors or for team members/ friends i.e. restrict your blog to only readers that you choose.
Reader access:
- Public
- Private to authors
- Custom readers
If you want to invite readers, you will need to enter their email address separated by commas or you may also click on Choose from Contracts button to select the name of friends you would like to invite.
However, if you want to invite someone to contribute to your blog, click on Add authors text link button under Blog Author section as shown in this screenshot.
After successfully invitation, the person to whom you have invited will get an email from the Blogger Team asking to accept the invitation.
The title message body of the invitation mail will depends on the option you had chosen.
A) For Author Invitation:
You have been invited to contribute to Name of your Blog
B) For Reader Invitation:
You have been invited to view Name of your Blog.
After clicking on the Accept invitation button, a window will appear displaying the Blog title, Blog url, the name of person who make the invitation and the date on which invitation mail would expire.
The invitation mail will be valid for only 30 days excluding the day on which the invitation has been made. For example if the invitation has been made on Tuesday, February 4, 20xx will expired Thursday, March 6, 20xx.
Unless the invitation is accepted you will see number of open invitations as shown in this picture.
A list of readers will appear under Blog readers section after accepting the invitation. At any point of time you can revoke any reader from accessing your blog by clicking the X link next to his or her name in the Blog Readers list.
Note that you can have up to 100 blogs per account and also can make a team of 100 members for your single blogger blog.